Whistler Bike Park: What You Need to Know Before You Go
The most famous mountain bike park on earth has its own mythology. Most of it is accurate. Here is how to experience it without the common first-timer mistakes.
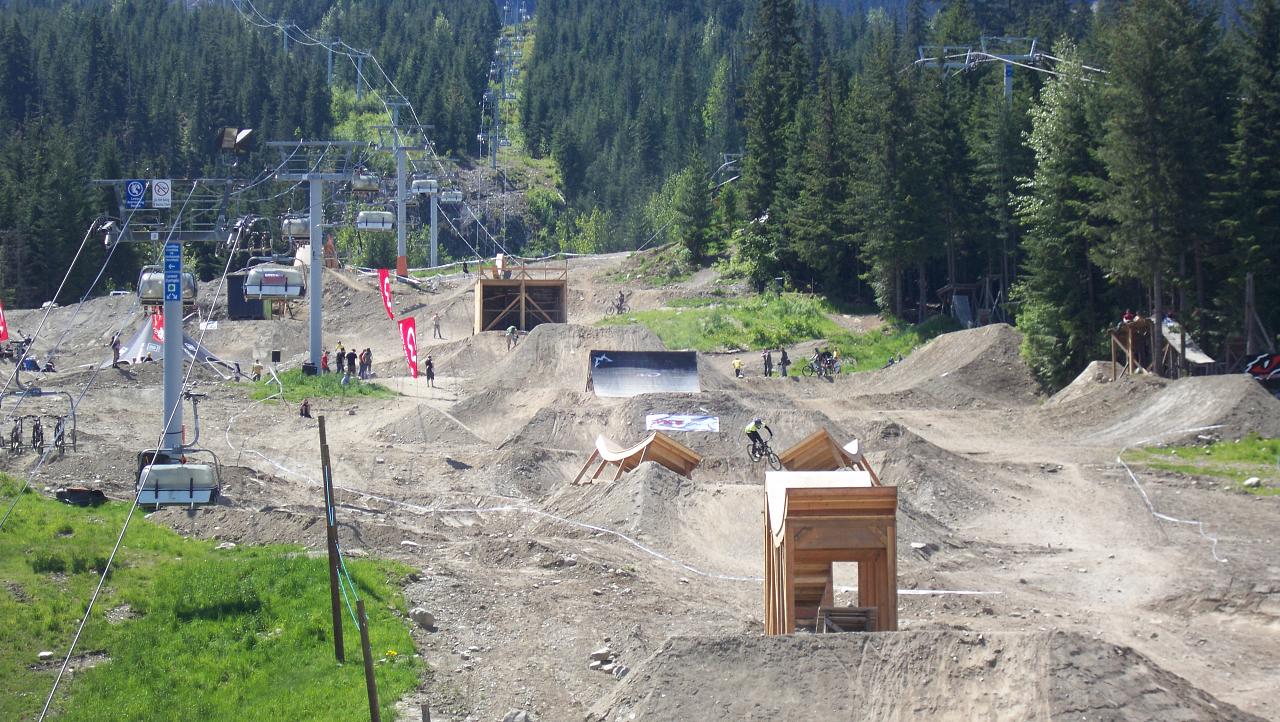

Whistler Bike Park operates from the Whistler and Creekside gondolas — the same infrastructure that makes Whistler the largest ski resort in North America serves a 4,900-acre bike park from late May through mid-October. The numbers are widely quoted: 80+ trails, 1,530m vertical, 66km of marked descents. What the numbers don't capture is the quality of trail construction, the sheer variety of terrain, or the concentration of world-class riders using it as a training ground on any given Tuesday in August.
The bike park is operated by Vail Resorts (who also run the ski operation) and has the budget to match. Trail maintenance is exceptional by any global standard. New trails are added most seasons. The trail map is large enough that a first-time visitor will spend the first day simply orienting themselves.
A-Line — the trail that defines Whistler
A-Line is Whistler's most famous trail and one of the most imitated trails in the world. Built in 1999, it popularised the big-jump flow trail format that has been reproduced at bike parks from Wales to New Zealand. The trail itself is double black diamond — large jumps (some exceeding 20 feet), high speeds, and a consequence level that is genuinely high if you get it wrong.
For most riders, watching A-Line from the viewing area is the appropriate Whistler experience. For experienced jump-trail riders, it is the reference point against which all other jump trails are measured. The local protocol: watch it first, ride the jumps on lower trails to understand the speed required, and do not attempt A-Line before you are absolutely ready.
Crank It Up — the correct progression trail
Crank It Up is the trail that most intermediate-to-advanced riders spend most of their time on at Whistler. A blue-black cross between a flow trail and an enduro descent, it has the jump rhythm of A-Line at approximately 60% of the consequence level. The jumps are rollable — you can choose your line and take the rollers rather than the take-offs until you are comfortable. This is the correct approach.
Dirt Merchant is the red line — large, sculpted berms, gap jumps, and the most photogenic sections of the bike park. It sits below the gondola mid-station and rewards riders who are comfortable at high speed with significant air.
Rental vs bring your own bike
Whistler's rental fleet is exceptional by any standard — modern enduro and downhill bikes, well-maintained, fitted with appropriate components for the terrain. For a first visit from Europe, renting makes sense: the cost of taking a bike as checked luggage on a transatlantic flight (£50–150 each way) plus the risk of damage in transit versus renting a park-specific bike for CAD $100–150/day is a reasonable trade-off to consider.
The counter-argument: your own bike is set up for your body weight, riding style, and preference. For riders who have a highly specific setup or who are attending for more than 5 days, bringing your own bike makes more sense. Use a hard-sided case and arrive with enough time to rebuild the bike before riding day one.
Sea to Sky corridor — Squamish as an alternative
Squamish, 60km south of Whistler on the Sea to Sky Highway, is a legitimate alternative base for riders who want natural enduro riding to complement Whistler's bike park. The Squamish trail network (managed by SORCA) is over 200km of trails on the Garibaldi Highlands — technical, natural, and free (a SORCA trail pass is requested but not enforced). The famous Half Nelson trail is a 3km technical enduro descent that regularly appears on "best trails in North America" lists.
A logical trip structure: 3–4 days at Whistler Bike Park, 2 days at Squamish. Stay at Whistler (better accommodation variety, nightlife, restaurants) and drive to Squamish for the natural trail days. The Sea to Sky Highway from Whistler to Squamish takes 45 minutes and is one of the most scenic drives in Canada.
Getting to Whistler
Fly to Vancouver YVR. Take the Sea to Sky connector bus from Vancouver Pacific Central Station to Whistler Village (2h30, CAD $42.50, bikes accepted with advance notice). Or hire a car — the drive from Vancouver to Whistler is 2h15 on the Sea to Sky Highway via Squamish, and is one of the great drives in North America regardless of destination.
Find a hotel in Whistler
Same prices as Booking.com. 1 tonne CO₂ retired per stay. €5 credit on signup.
Search now →